Introduction:

Objective
Solution
This solution will show you how to generate a strong name key file and eventually sign it for use in the GAC. It can also be used to change an existing strong key file assigned to a DLL.


You received one utility assembly that you want to use in most of your project and you want to make it publicly available for others too, and you decided to install it in Global Assembly Cache (GAC), as you know to install any assembly in GAC it should have strong name assigned, while installing your fond error:
“Failure adding assembly to the cache: Attempt to install an assembly without a strong name”
Objective
You have a DLL file when you try to install it in GAC you discovered that strong key is not assigned to this DLL and you don’t have source code for that DLL too. Now challenge is how to add strong name in this DLL?
Solution
This solution will show you how to generate a strong name key file and eventually sign it for use in the GAC. It can also be used to change an existing strong key file assigned to a DLL.
- Make sure you have backup of the DLL file in a safe place.
- Generate Strong Name Key file using the “SN” command.
- Disassemble DLL file into IL (Intermediate Language) file using “ILDASM” command.
- You can see “.IL” file is generated
- Now assign the “.SNK” file to the “.IL” file
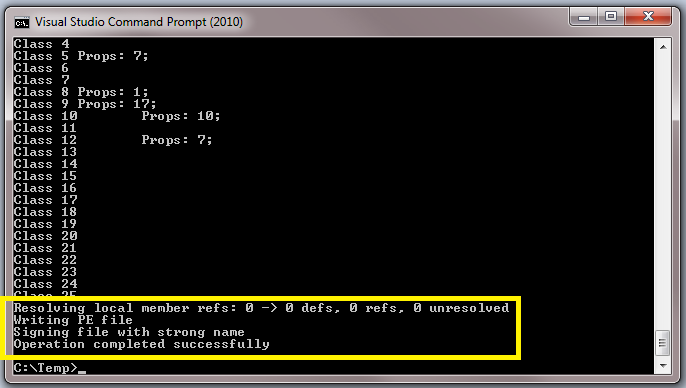
- You can see the result after executing this command.
- Now it is time to validate the newly generated “.DLL” file


Your newly generated DLL is ready to go .
After generating the .il file I get a lot of .resources files + a .res file, a .png and a .bmp file generated by ildasm. How can I embed them to the signed assembly?
ReplyDelete